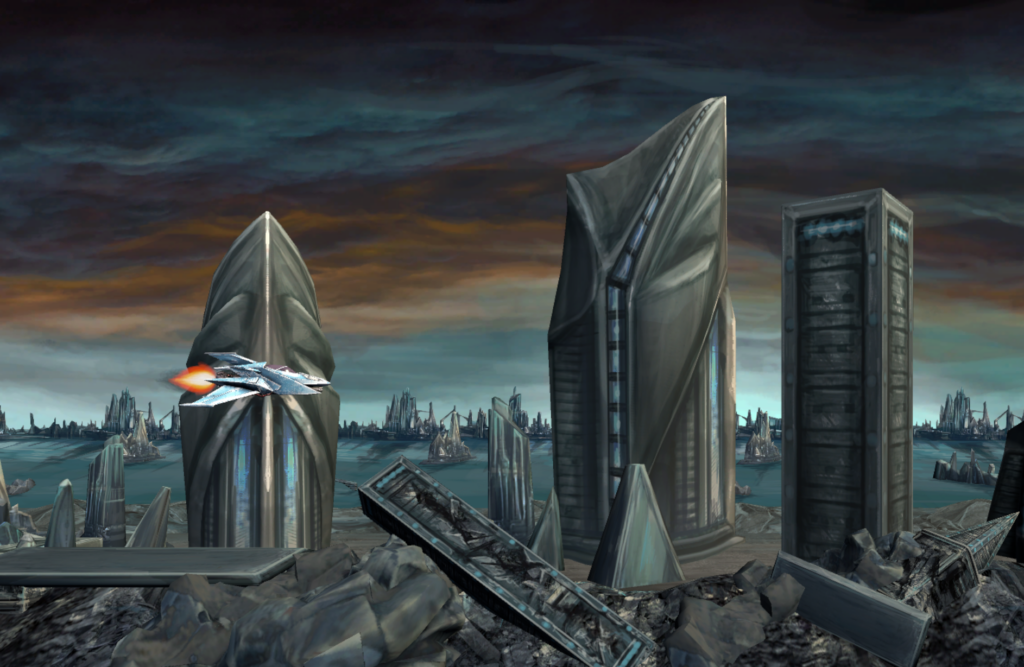
When creating all visuals/artwork, we try to follow the traditional principle of starting from the background and working your way into the foreground. For Laser Wing this was perfect given the game’s natural blend of 2D/3D. The early concepts took inspiration from games such as Star Fox 64 and R-Type in terms of their scenery. We wanted a slightly unique take on modernising the retro look.

The background ocean and horizon fallen cityscape took inspiration from several sources including films, games and the real-world. These layers were broken down into concept art first before being applied to 3D models.
The sky being the farthest away asset from the player’s view was created first using opacity brushes in Photoshop. Lead artist Lewis Sanderson used the offset filter to check the lateral tiling of the image. This underwent several changes to improve the colour balancing against the player’s ship. Eventually, a much darker and chaotic weather climate proved for a clearer visual.

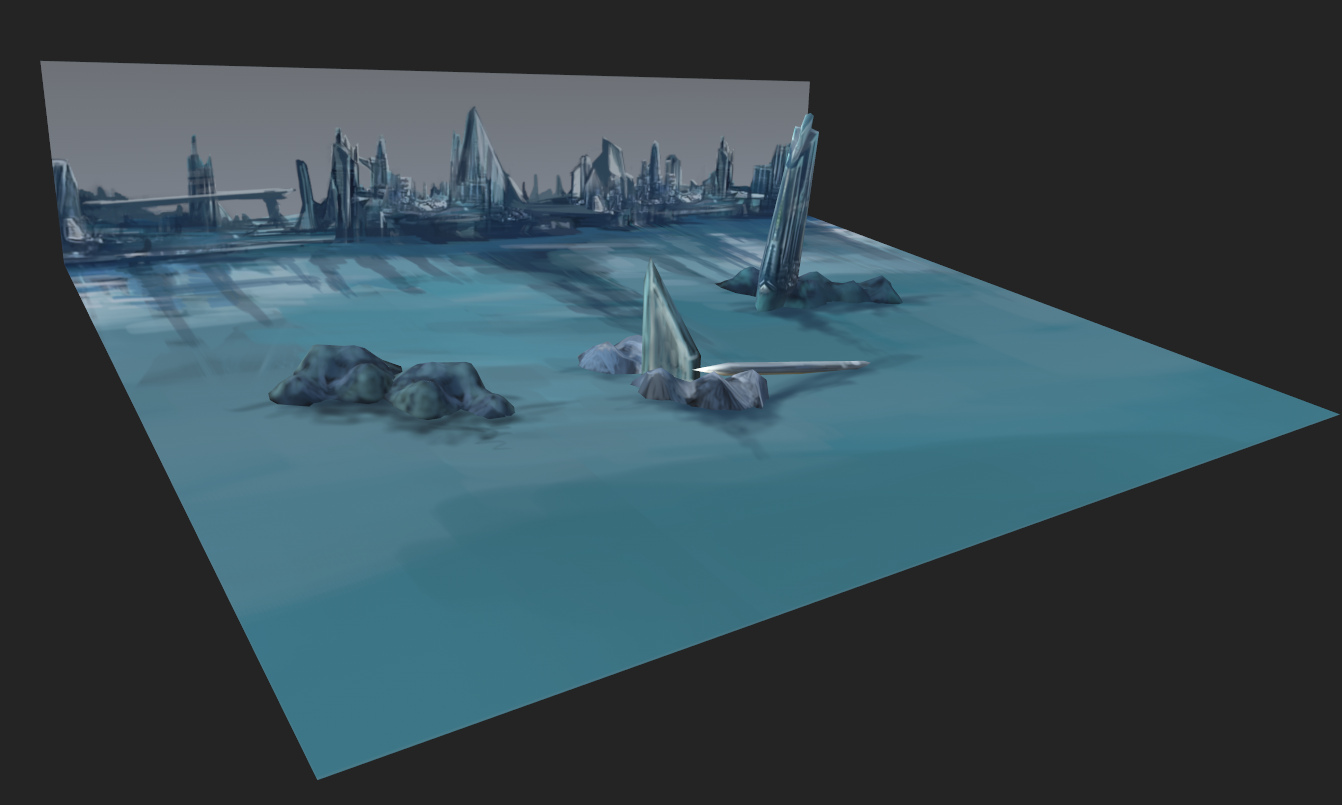
The next step was to isolate the horizon cityscape and ocean. This asset could no longer be a flat plane image like the sky but still needed to remain somewhat 2 Dimensional to avoid an unwanted clash with the foreground. The concept image was again, cut apart and squashed into a square texture space using Photoshop. This proved to be the more efficient workflow rather than creating time consuming 3D models for almost no visual gain. It’s a background asset after all!

This texture was then applied onto a square plane inside of 3DSmax with edges being added and rotated as shown:

This texture to geometry (2D to 3D cutout) method allows for simple models to be made speedily without having to worry about UV coordinates. Shadow markings were also implemented for where some scattered 3D buildings would be placed. These buildings again were not intended to be highly detailed in terms of 3D modelling, but did require more shape than the previous assets.

Inspiration from large modern buildings like London’s ‘Shard’ were utilised and multiple textures were painted straight onto a square document using opacity brushes. The idea here was to imagine how each model would look if it was to be completely flattened out onto the floor so that every side could be seen.
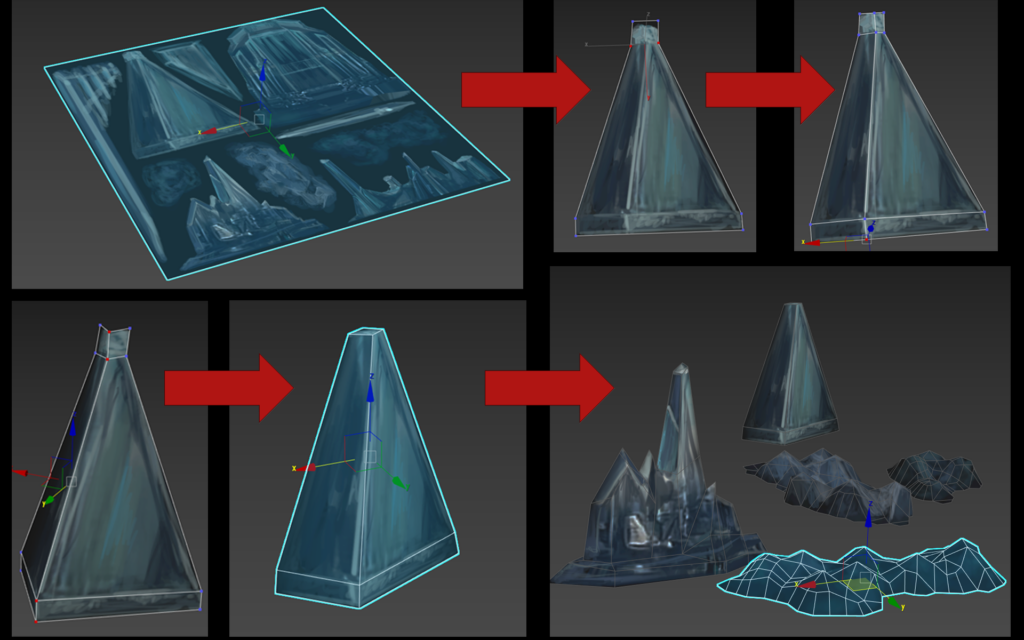
As with the with the sky and horizon cityscape, the square texture was applied onto a plane. Each texture was cut out using the cut tool…Who would have thought it!
Once this was complete, extra edges were added so that the flat image could be folded and shaped as needed. Think of it like 3D origami!

Finally, these assets were positioned within the ocean and all the textures were colour adjusted and shaded inside of Substance Painter.
